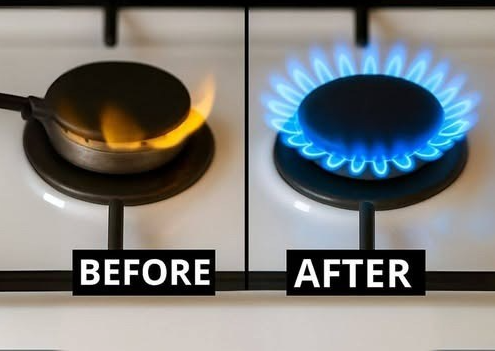
If you’ve observed that your gas stove’s flame is dim, inconsistent, or wavering, the issue often lies with obstructed nozzles. Over time, grease, dust, food bits, and grime accumulate in the small openings where gas passes through. This buildup hampers the flame, slowing down cooking, reducing efficiency, and increasing gas consumption. Thankfully, you don’t need to contact a professional immediately—a straightforward do-it-yourself approach can rejuvenate your stove’s performance using a few common household items.
What You’ll Need
- Liquid aluminum cleaner: Safe for metal components yet effective at tackling grease and dirt.
- A thin wooden stick, tube, or spoon handle: Ideal for delicately clearing debris from inside the gas tube.
- Toilet paper or soft tissue: Perfect for wiping away dislodged grime and drying cleaned surfaces.
Step 1: Prepare with Safety in Mind Prioritize safety before starting. Ensure the stove is fully turned off and the gas supply is disconnected to avoid leaks or accidental ignition. Remove the stove grates and take off the nozzle caps to access the openings that require cleaning. Keep your tools within reach to streamline the process while the cleaner works its magic.
Step 2: Use the Cleaner Apply a small amount of aluminum cleaner directly onto the nozzle heads. Let it sit for five to ten minutes, allowing the solution to dissolve tough grease, loosen food particles, and soften debris lodged in the nozzles. Steer clear of harsh chemicals not designed for aluminum, as they may erode the metal and harm your stove.
Step 3: Clear the Gas Tube After the cleaner has had time to act, focus on the primary blockage. Take your wooden stick, tube, or spoon handle and carefully insert it into the gas tube opening. Gently move it back and forth to free any debris obstructing the passage. You might see bits of hardened grease or dust dislodging—this is the culprit behind your weak flame. Proceed cautiously to avoid damaging the tube or scratching its interior.
Step 4: Wipe and Dry Once the debris is loosened, use toilet paper or soft tissue to wipe away the residue around the nozzle and inside the openings. Continue wiping until the area appears clean and free of buildup. After removing all visible grime, let the cleaned components dry thoroughly. Any remaining moisture could disrupt gas flow, so take your time before reassembling.
Step 5: Reassemble and Test When everything is dry, reattach the nozzle caps and grates. Reconnect the gas supply and cautiously turn on the stove. Your flame should now burn brighter, more consistently, and evenly across the burner. This improvement will speed up cooking and minimize unnecessary gas usage.
Helpful Tips
- Clean your stove every two to three months to maintain optimal performance.
- Always choose aluminum-safe cleaners to prevent corrosion and prolong your stove’s lifespan.
- After reassembling, perform a quick gas leak check by listening for hissing or using a soapy water test on connections.
This easy maintenance technique requires little effort but yields impressive results. By keeping your stove clean and free of clogs, you’ll enjoy faster cooking, lower gas expenses, and an appliance that performs like new for years to come.