Canning beans at home is one of the most useful and satisfying kitchen skills you can develop. It gives you the ability to preserve the natural taste and firm texture of beans while creating a dependable pantry supply that supports everyday cooking. By preparing your own jars, you gain complete oversight of the ingredients that go into your food, avoiding preservatives and unnecessary additives. This homemade canned beans method provides flexibility, reliability, and long-term value for anyone who enjoys cooking from scratch.
This approach works well with a wide range of beans, including black beans, kidney beans, pinto beans, and cannellini beans. Each variety responds beautifully to pressure canning and maintains excellent quality when stored properly. Once the jars are finished, you will have beans ready for soups, salads, stews, chilis, and side dishes at a moment’s notice, saving both time and money throughout the year.
Ingredients
To begin, gather four cups of dried beans. You may choose black beans, kidney beans, pinto beans, cannellini beans, or another preferred variety. You will also need twelve to fourteen cups of water for soaking and initial cooking, six to eight cups of fresh water for filling the jars, and one teaspoon of canning salt per quart jar if you choose to add it for flavor. Regular salt may be used, although canning salt helps maintain clarity in the liquid.
Equipment
Safe bean canning requires a pressure canner, as beans are considered a low-acid food and must reach a specific temperature to ensure safety. You will also need clean glass canning jars in pint or quart sizes, new lids and rings, a large pot for cooking the beans, and standard canning tools such as a jar lifter, funnel, and bubble remover. Having all equipment ready before you begin helps the process move smoothly.
Step One: Preparing the Beans
Start by spreading the dried beans on a clean surface and checking them carefully. Remove any damaged beans, small stones, or debris. Rinse the beans thoroughly under cool running water. Place them in a large bowl or pot and cover them with several inches of water. Allow the beans to soak for eight to twelve hours, or overnight. This soaking step softens the beans, reduces cooking time, and supports better digestion.
After soaking, drain the beans and rinse them again. Transfer them to a large pot and add fresh water, covering the beans by approximately two inches. Bring the pot to a rolling boil, then reduce the heat and simmer for thirty minutes. At this stage, the beans should be partially cooked and firm rather than fully tender.
Step Two: Preparing the Jars
While the beans simmer, wash the jars, lids, and rings in hot, soapy water. Rinse them well and keep the jars warm until you are ready to fill them. Warm jars help prevent cracking when hot beans and liquid are added.
If desired, add one teaspoon of canning salt to each quart jar. This step enhances flavor without affecting safety. Fill each jar with hot beans, leaving about one inch of headspace at the top. Pour hot cooking liquid over the beans, maintaining the same headspace. Use a bubble remover or nonmetal utensil to release any trapped air. Wipe the rims clean, place the lids on the jars, and secure the rings until fingertip tight.
Step Three: Pressure Canning
Place the filled jars into the pressure canner according to the manufacturer’s instructions. Add the recommended amount of water to the canner and secure the lid. Heat the canner until steam vents steadily, allowing it to vent for ten minutes before applying the weight or closing the vent.
Process pint jars for seventy-five minutes and quart jars for ninety minutes at the pressure appropriate for your altitude. After processing, turn off the heat and allow the canner to cool naturally. This cooling phase is essential for maintaining proper seals.
Step Four: Cooling and Storage
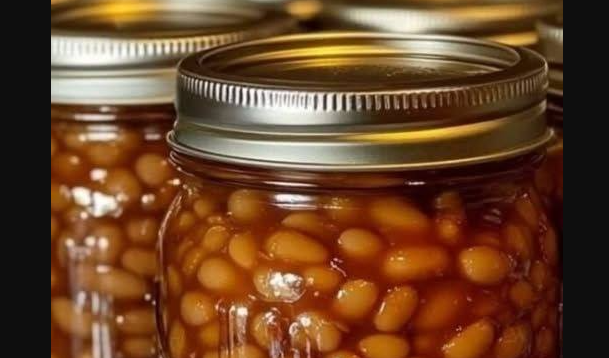
Once the canner has fully depressurized, carefully remove the jars and place them on a towel. Leave them undisturbed for twelve to twenty-four hours. After cooling, check the seals by pressing the center of each lid. A properly sealed lid will remain firm.
Label the jars with the date and store them in a cool, dark location. When stored correctly, home-canned beans maintain excellent quality for up to one year.
Final Thoughts
Preparing homemade canned beans offers lasting convenience, dependable nutrition, and confidence in your food supply. Each jar represents thoughtful preparation and practical planning. With this method, you create a pantry staple that supports a wide range of meals while keeping ingredients simple and familiar. Over time, canning beans becomes an efficient routine that delivers flavor, flexibility, and peace of mind throughout every season.